Back to blog
Article
Office Chair Installation Guide
Admin October 09, 2026
The installation steps for different types of office chairs are as follows:

Livorno E300D Office Chair
- Pre-installation Check: Ensure the chair's leather surface is free of scratches and all accessories (such as screws and tools) are present. Contact customer service if there are any issues.
- Install the Five-Star Base: Align the casters with the holes in the five-star base and press firmly until fully embedded. Install all five casters in sequence.
- Install the Gas Lift: Insert the gas lift vertically into the center hole of the five-star base, ensuring the bottom is securely in contact.
- Install the Seat Base: Insert the gas lift into the center hole of the seat base, flip the seat base upright, and check that the gas lift is tightly connected to the seat base.
- Install the Backrest: Slide the backrest diagonally into the pins on the seat base until you hear a 'click' indicating it is securely installed.
- Install the Armrests: Align the upper and lower armrests with the holes on the seat base, press down, and tighten the screws on both sides to ensure the armrests are stable and do not wobble.
- Connect the Wires: Connect the backrest, functional wires, and power wires (four in total) in sequence, checking for any tangles or loose connections.
Five-Star Base Office Chair
- Prepare Tools: A screwdriver is required.
- Install the Casters: Insert the casters into the holes on the five-star base. Some models may require twisting to insert. Press firmly to ensure they are secure.
- Install the Gas Lift Cap: Flip the five-star base, remove the gas lift cap, and place the gas lift into the center hole.
- Install the Seat Plate: Lay the seat cushion flat on the ground, align it with the seat plate, and tighten the screws, paying attention to the compatibility between the seat plate and the cushion.
- Install the Gas Lift: Lift the seat cushion and insert the gas lift into the hole on the seat plate, ensuring it is vertical and not tilted.
- Install the Armrests: Distinguish between left and right armrests, align them with the holes, and initially secure the screws without fully tightening them.
- Install the Backrest: Align the backrest with the holes on the armrests, install the bottom screws first (without tightening), then lift the backrest to install the top screws, and finally tighten all screws.
- Final Touches: Check that all screws are tightened and install the armrest decorative caps.
Common Office Chair
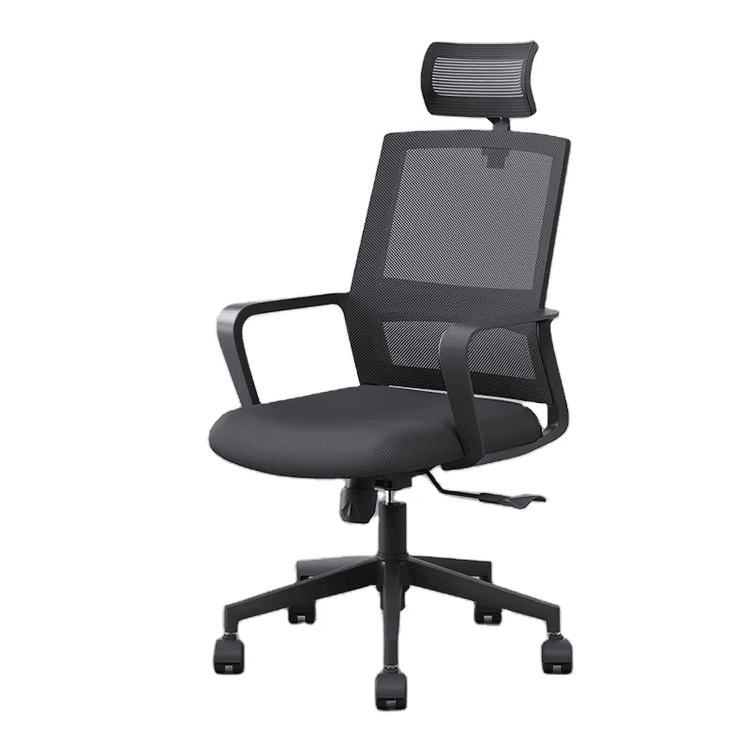
- Install from Bottom to Top: First, install the casters onto the chair base, then insert the gas lift vertically into the center of the chair base.
- Install the Seat Plate and Seat Cushion: Use screws to secure the seat plate to the bottom of the seat cushion, ensuring a tight connection.
- Connect the Backrest and Seat Cushion: Align the backrest with the seat cushion, secure the screws, and then insert the base into the gas lift.
- Install the Armrests and Headrest: Install the armrests according to the holes and finally install the headrest (if applicable).
Ergonomic Chair
- Install the Casters: Press the casters directly into the holes on the chair base until you hear a 'click' indicating they are installed.
- Install the Armrests: Distinguish between left and right, secure the screws (with washers), adjust the position, and then tighten all screws.
- Install the Footrest (if applicable): Pay attention to the direction and either snap it in directly or follow the instructions.
- Install the Backrest: Secure the backrest with three screws, position it first, then tighten it to ensure a stable connection with the seat cushion and armrests.
- Install the Gas Lift: Install the gas lift with the pressing end facing upwards to ensure proper functionality.
Precautions: Read the instructions carefully before installation to avoid missing steps; use tools safely to prevent scratches; after installation, check that all components are secure to ensure safe use.